
How To Make a Short Film With Only One Light Source
Nov 05, 2022Hi, we have made a short film. It was: two days of shooting, 7 locations, only one light source, Red Komodo as the primary camera, one week of pre-production and 5000$ budget for filming. I am going to show you a few schemes of working with natural light, working with interior scenes utilizing only one Nanlite Forza 500.
Also, I will show you the whole project creation process. If you make your own low-budget film, I’m sure this information will be helpful. So, my good friend has made a script for this project and works as a director on it. My wife and I worked as producers, set designers and DP. Generally, as on any film project, we had a pre-production plan. The pre-production list looks like this:
- Cast. We needed to find good actors. The actors have to have a cinematic texture of appearance. And, of course, good skills in working with dramatic roles. I think that it’s a really important point! Because you can have a really good film with just an excellent actor and a story! My friend Ted told me about a good example: the movie “Locke” with Tom Hardy. The pretty interesting story was filmed in a car with one brilliant actor inside; it looks awesome and works! And If you are a Director, I think a good actor cast and an interesting story are your main tools for filmmaking. This is the basis for a good movie.
- Location searching. It’s quite expensive to film a story in several locations in one shooting day because moving can waste a few hours. Also, you risk losing a few daylight hours since we work with natural light. Why did we work with natural light? It's cheap and fast.
BTW, I’ve made a big and free master class of working with natural light and location for you where I’m telling a lot of useful information about location searching, the Visual style of the characters in the scene, and secrets of working with natural light. The master class turned out to be quite large. It concentrates on useful information, and it's very valuable for me because I don’t want to publish it on YouTube, but it is private access for everyone. And You can get there completely free, just registering using the link.
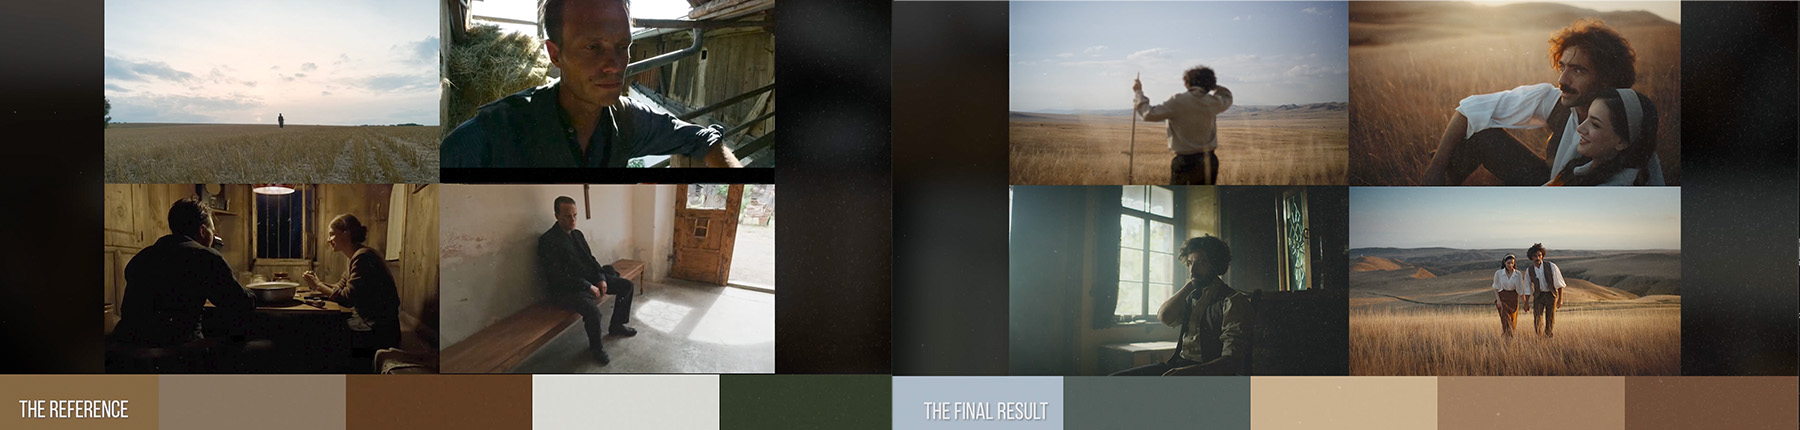
- Props and clothes picking. We had a certain colors compilation for this story and tried to find things using this color pallet as a reference. We had color control of the wardrobe for actors and props for the story. We rented some props and clothes from a local film studio, and some things were bought at a second-hand shop.
- Tools for filming. As a cinematographer, I want to have good tools for great visuals. And I had a choice to waste a limited budget on a light department, with a few powerful light sources and crew, or I could hire a focus puller and 1ac with a good cinema camera with cinema lenses. I choose the second option. And my set was: Red Komodo camera, Zeiss Super speed lenses, a Dana Dolly slider and a heavy and smooth tripod head for smooth camera moving. It does not mean I ignore working with light; I just want to choose cheap and available tools like the sun and daylight as key and major light sources in the scene. Anyway, I will show you a few light setups with natural light. I think it would be useful for you.
We did all the items in one week, but to be honest, I was scouting for a month. Many places refused our requests to shoot, but we did not give up and searched for other places. As a result, we found something. If you want to find a cool place for your movie, I recommend searching long before filming. It is good if you already have a few locations for filming before you get a script.
This looks like this: when I read the text, I think this scene would be good to shoot in this place etc. In “this place”, I mean a familiar place you have visited before.
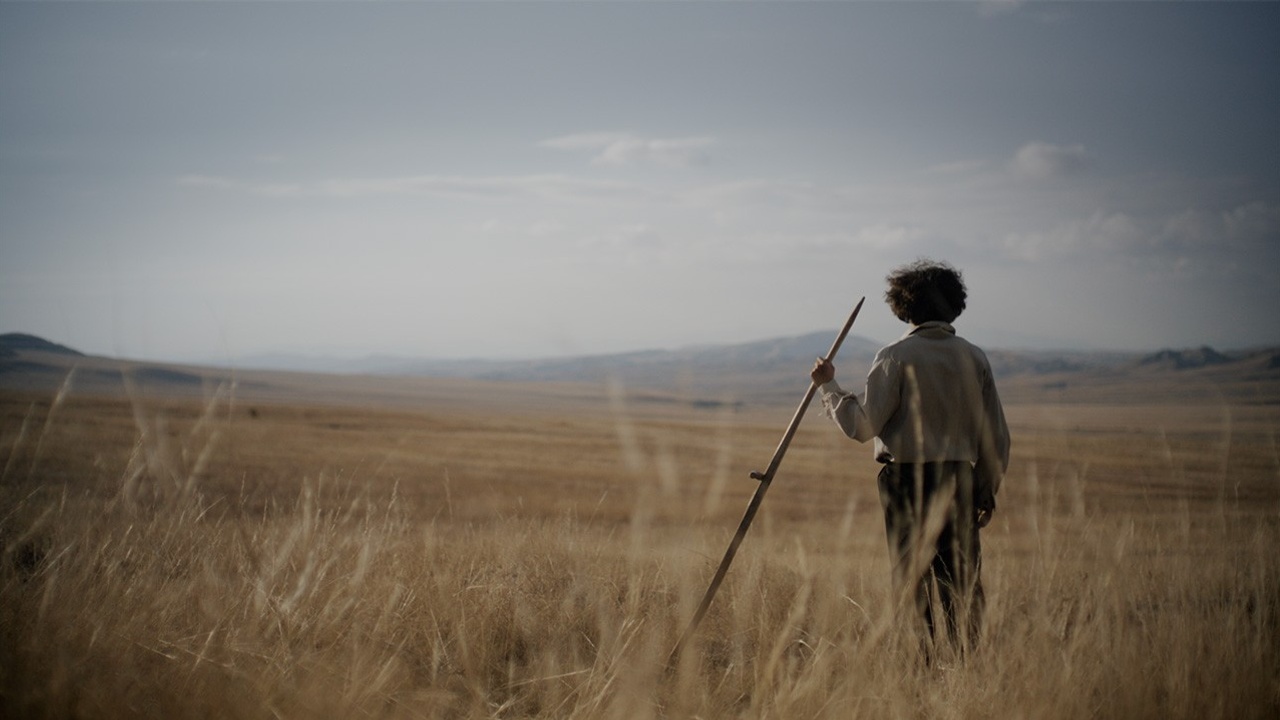
Breakdown of the scene #1
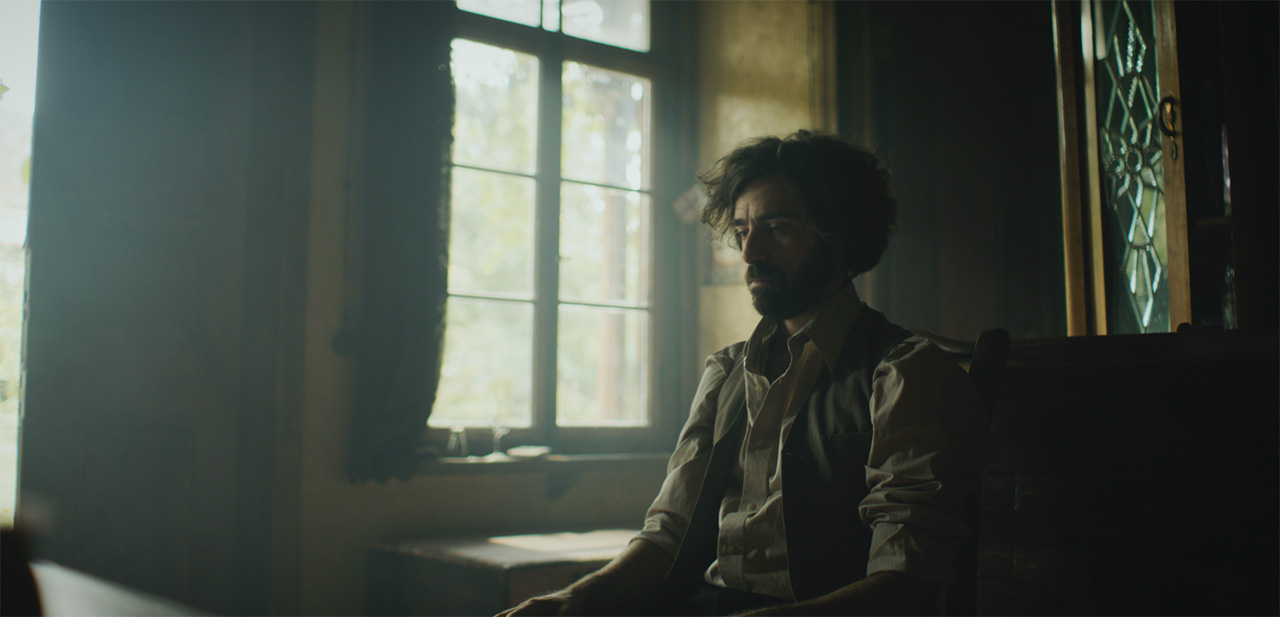
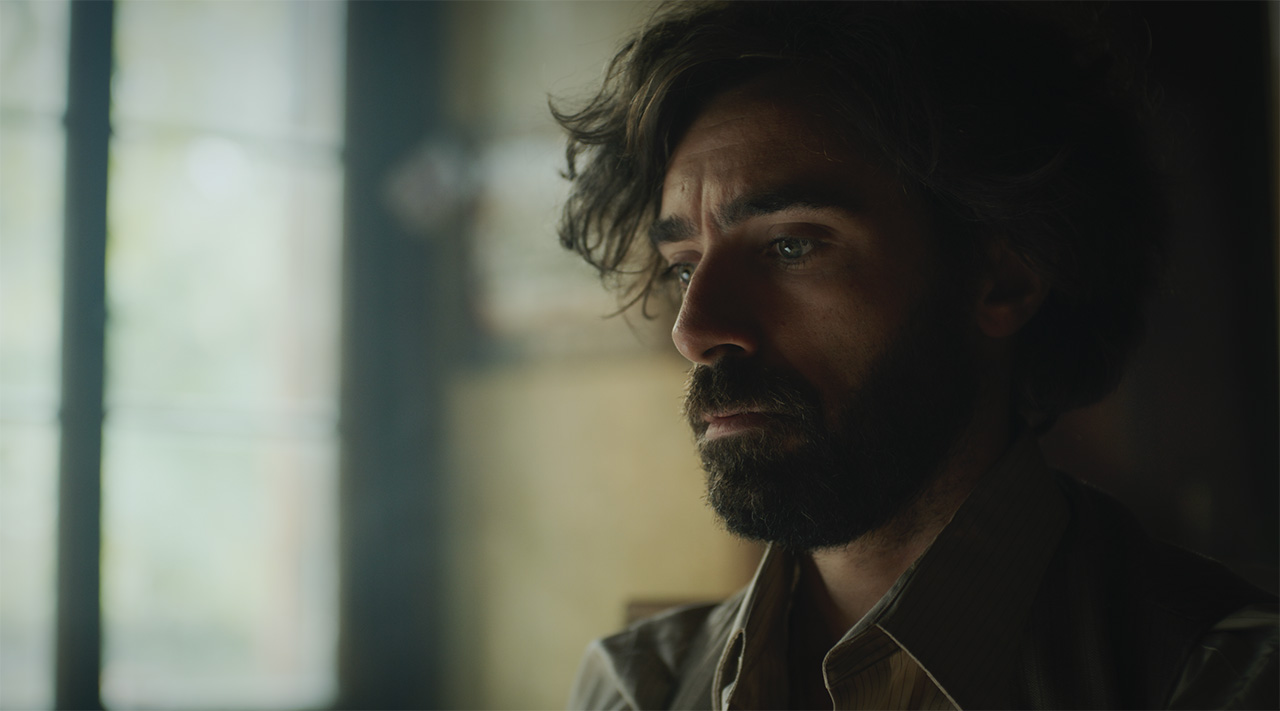
The main part of the plot takes place in the house. And in most cases, when we have a house as a shooting place, logical, we have the windows here. A window - it’s a brilliant source of daylight, and in our case of a low-budget production, this is a good and free source of the key light. I love to use a side light as a key for the characters, and in most cases, I try to put the actor's beside the window. Consequently, the character has a light side from the window and a dark area from the room side. It looks volumetric - light and dark in the frame. It Especially looks volumetric on the characters because he has a contrast in this case.
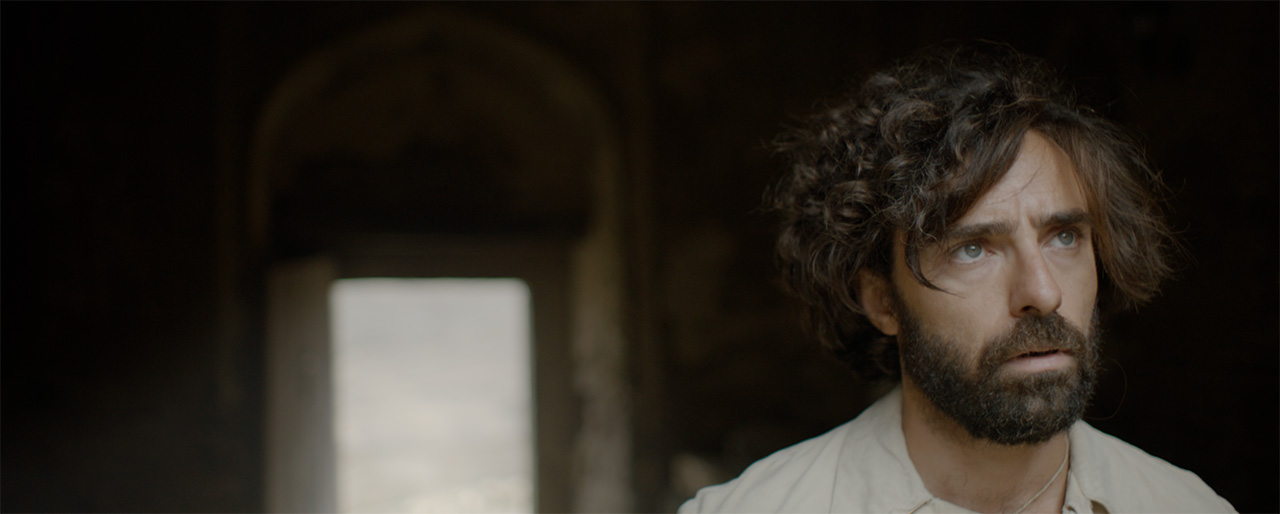
I had the cool and powerful "Nanlite 500 Forza" light in my arsenal. The lighting power of this source is enough to make fake sunlight in a room like this. Considering the small scene, the one source suited this location because we have no big windows, no large quantity of them, and just one actor in the frame. The one light source, it’s not bad for a case like this. Using natural light mixed with artificial, I can make an additional light flow for or intensify the contrast and exposure using Nanlite 500W.
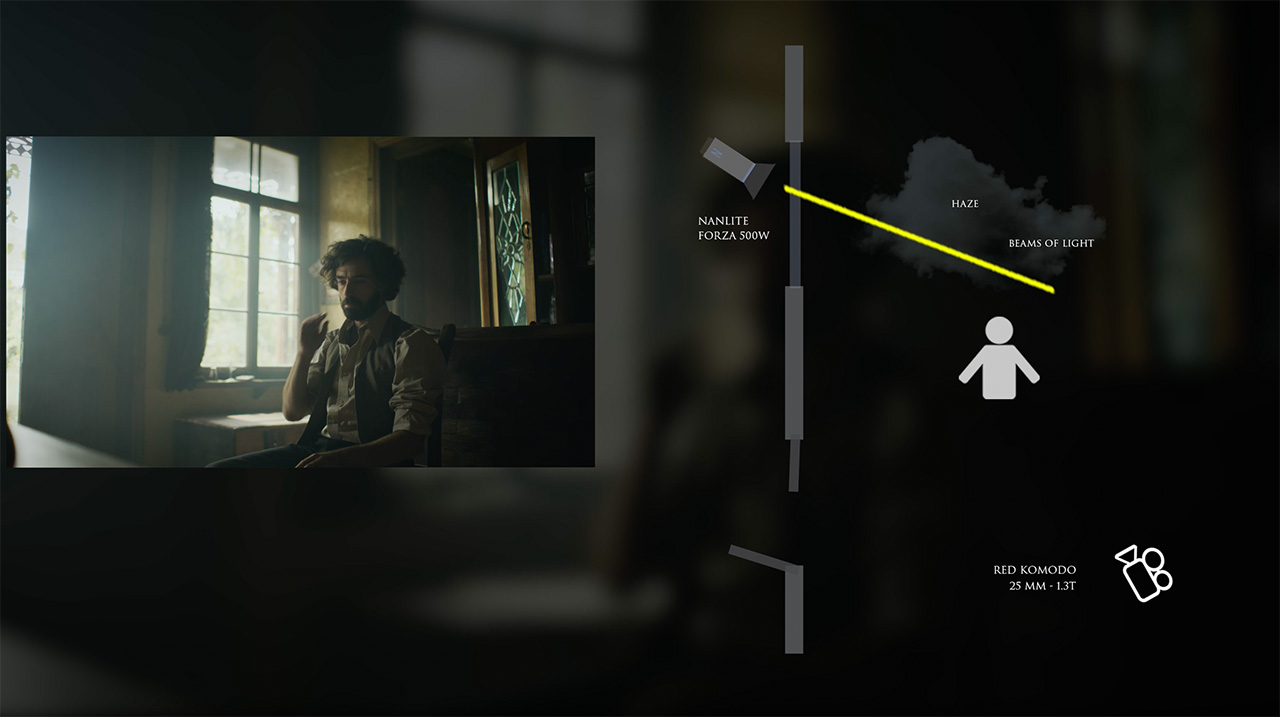
For the close-up shot, using Nanlite, I've made intensified major lighting from the entrance side. The light flow is directed to the floor and bounced from the foam board, thereby creating an additional contrast on the character's face. Also, we see a glow in the eyes; the reflection causes it. According to the rule of cinematography, this adds artistic expressiveness to the character’s portrait.

For the medium shot, I used Nanlite for beams of light from the window. I think you guessed that there is a haze in the scene. Yes, it is. The haze helped to show and highlight these beams. Also, for focused light, we used a Fresnel lens. I use the Fresnel lens many times in the scenes; it helps save a lot of light flow and puts the focus in the right place. Also, I have more expressive rays and sharper shadows with the lens.
To be honest, my biggest worry during and before filming was that there would be bad weather, that it would rain. I planned to take many shots with the sunlight and create a happy mood. If we had rain, it would be a complete failure. And you know what? The weather was bad, but for dull and sad scenes of the plot. It was matched perfectly. And when we were going to make high and bright key scenes, a miracle happened. Just compare these two scenes; the time difference between both is about 30 minutes. It was lucky when the clouds disappeared because the weather prediction looked bad on this day.
Breakdown of the scene #2
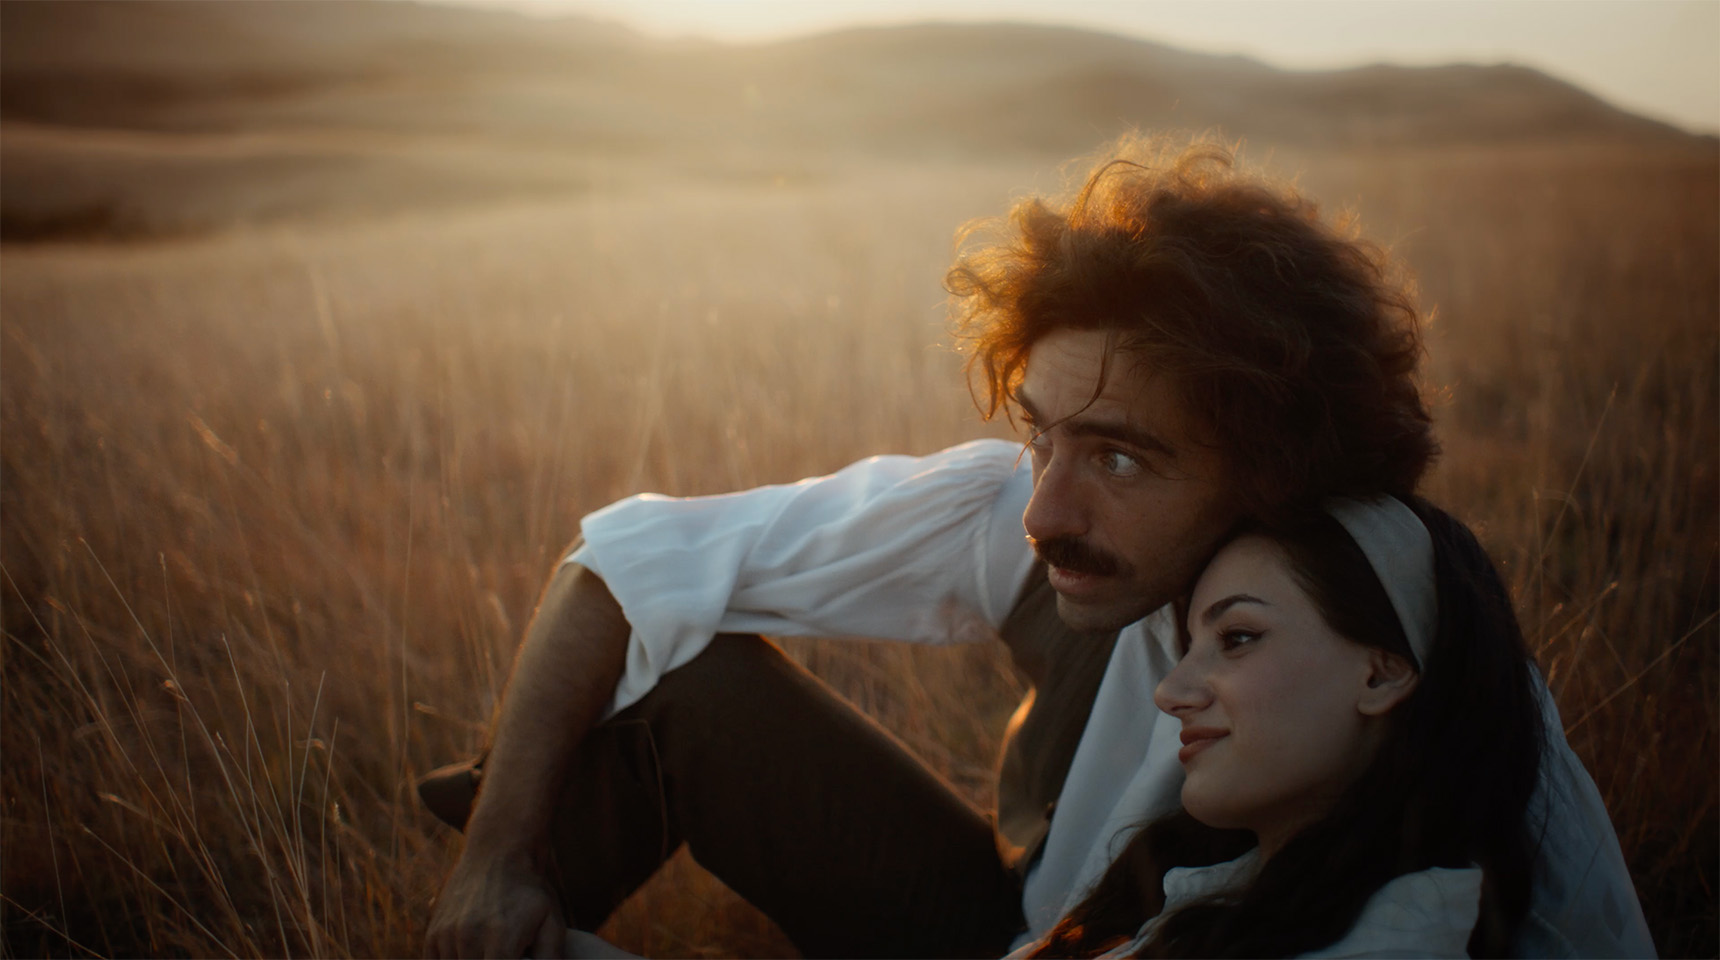
When we have a good set design, wardrobe and color harmony, these can give us the ability to make good shots with natural light using simple light schemes. This scene is a simple example of it. The Light setup is pretty simple. The sun shines as a backlight here. We just highlight the characters utilizing beautiful natural light sources available to everyone. For glow in the eyes, I add the additional light point. I just reflect the lighting from the sun via white foam.
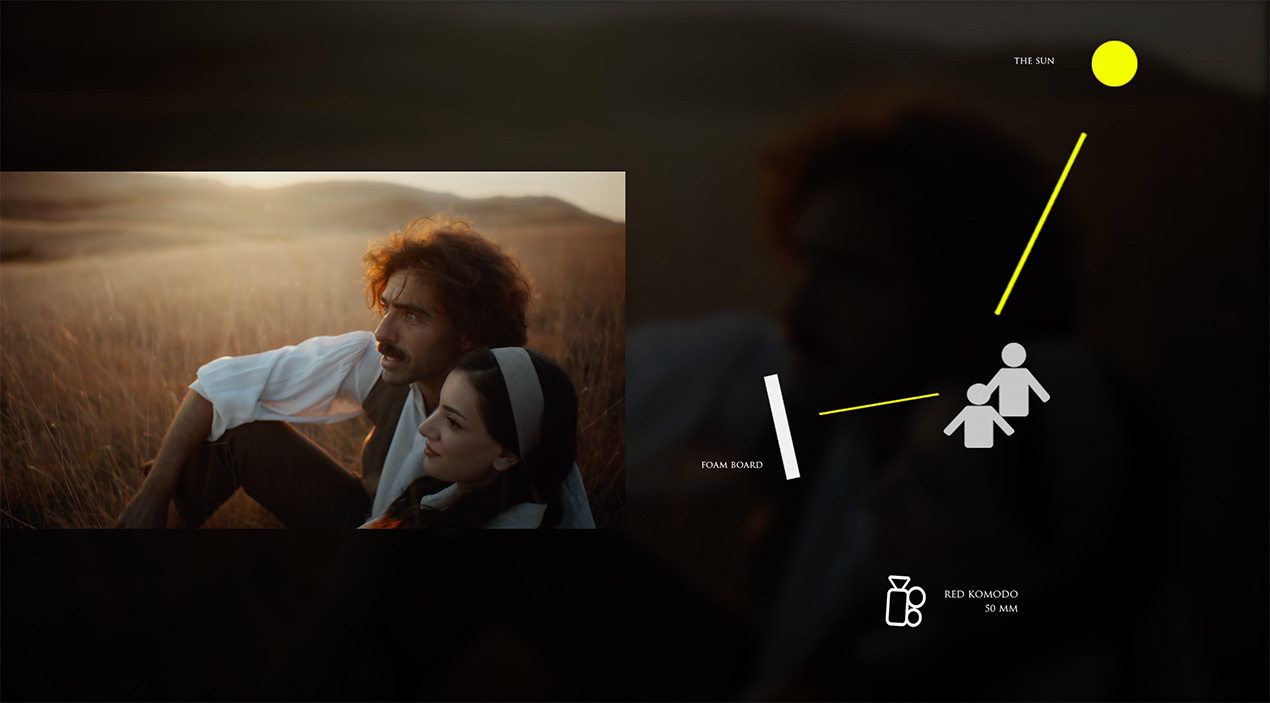
Also, this reflection works as an additional side light. I leave shadows on the characters' sides near the camera to avoid flat lighting. This is creating cool shots with set design and character appearance;
If you can make backlight with the sun, you must shoot anything after sunset. The blue hour, it’s a magical and beautiful time for filming. We had about 30 minutes until the sky went out.
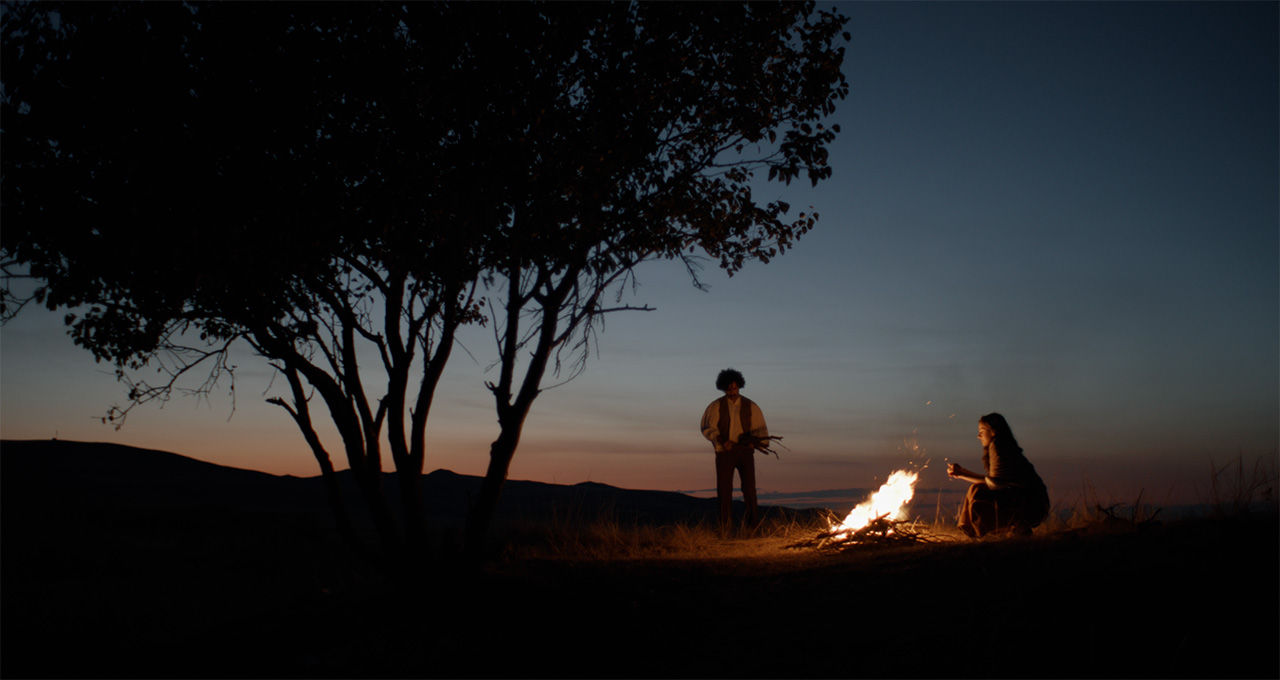
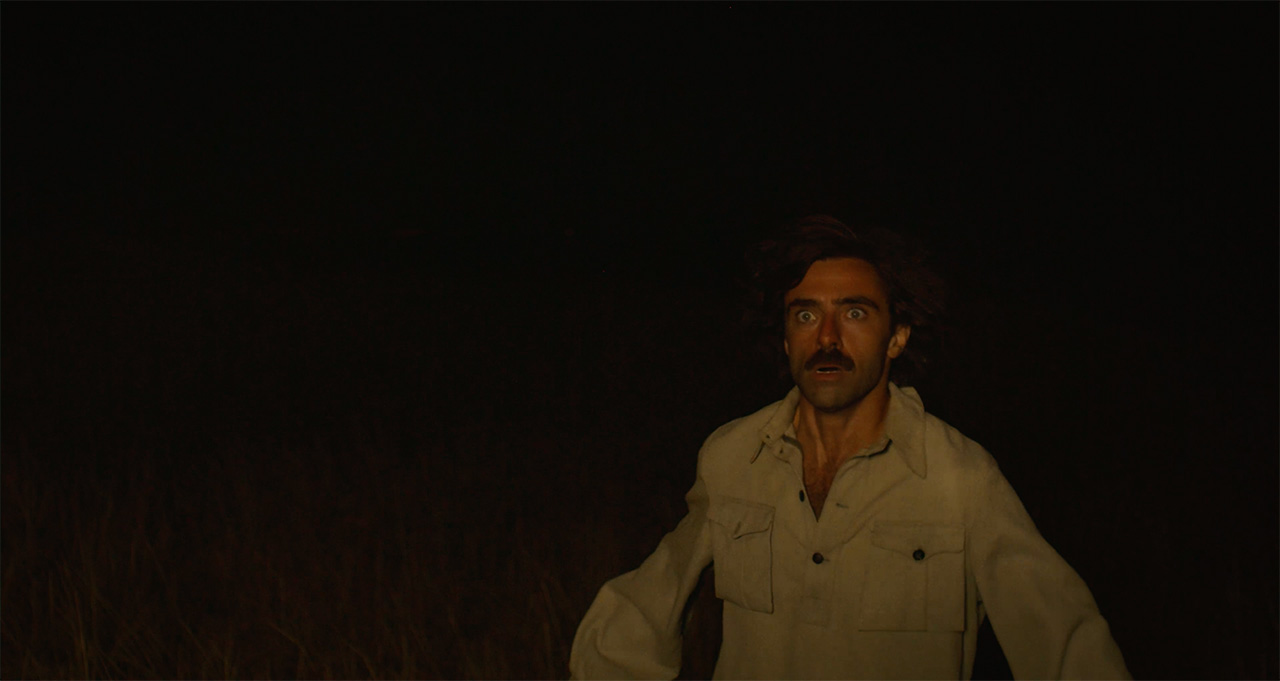
And for this scene, as you can see, we made a campfire. Nanlite + set Nanlite had a pretty cool option working in effect mode. We had a specific scene where a big fire should have lighted the character. Making a big fire in a dry field is a very dangerous idea. We solved this problem by simply turning on the TV mode on the Nanlite.
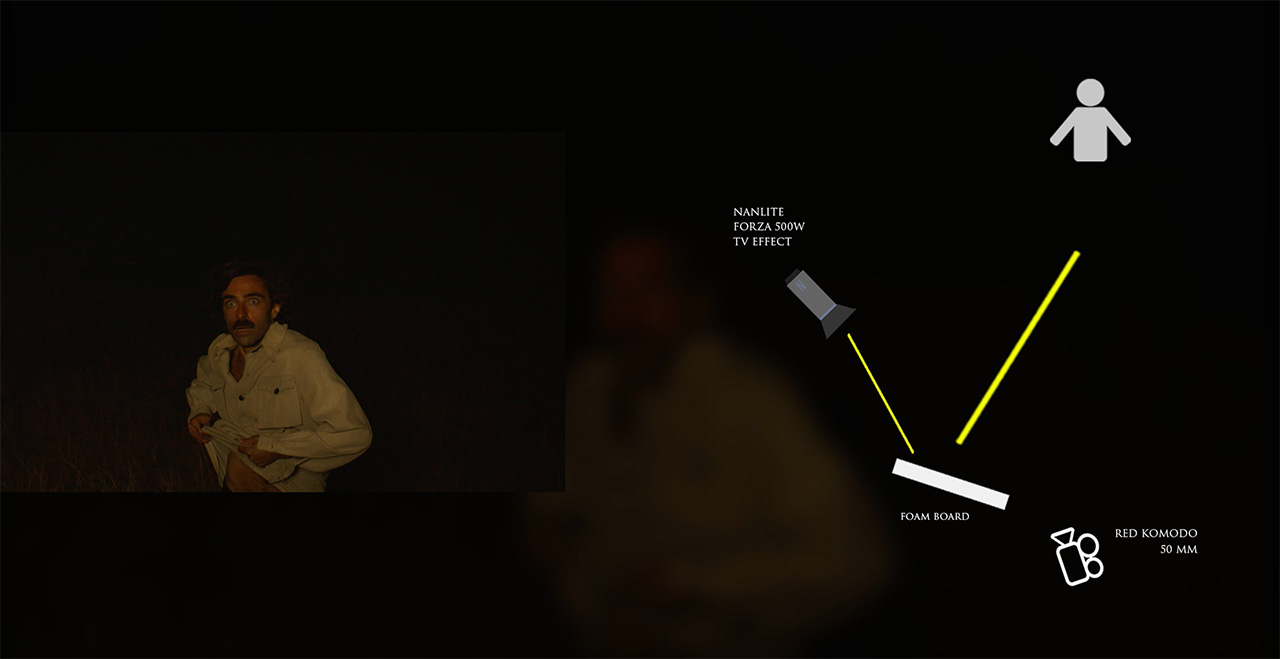
How we powered the light in the field? We used a small generator on 2kw. As this LED source uses very little electricity, working in the field, one generator is enough for 2KW. Direct lighting has a few flaws in working with middle and close-up shots. It makes a very hard light. For shadow smoothing, I bounce light, like in this setup.
The value of the film is about $5000. This is the summary wasting for all positions. Scouting, transfer, location, gears, and staff. At this moment, we had about 14 minutes of final editing. Since we had two days of shooting, we made about 7 minutes for each day. It’s a huge number for the movie, and if we had no professional actors, I think we would have had trouble.
For good takes, we had few tries. If the actor had little experience, we would have wasted a lot of time on takes, and the movie would have been much shorter. Daily movie timing would be about 3 minutes. Anyway, if you have an idea to make something cool, just do it, mate! Anyway, Filmmaking can be cheaper than $5000 for a film.
